Walmart Embraces Amazon MCF: A New Era of Cross-Platform Fulfillment for eCommerce
Walmart Embraces Amazon MCF: A New Era of Cross-Platform Fulfillment for eCommerce

In Short: If you’re thinking about selling on Walmart.com, we bring you a simple guide explaining the steps that can help you become a seller on Walmart in no time! You can start right from the Walmart Marketplace Application process, move to Registration on Seller Center, Set up a Walmart Partner Profile, Complete Item Set-up, Upload inventory and finally launch your Walmart Seller account.
If you want to find out everything about Walmart.com’s application and registration process, this 6-step guide is all you’ll need.
Follow these 6 simple steps in Walmart’s onboarding process:
1st Step: Apply to start Walmart’s Onboarding Process and seek Approval
2nd Step: (Once Approved) Complete Walmart Seller’s Registration Process
3rd Step: Complete Partner Profile
4th Step: Item Set-up
5th Step: Upload Inventory
6th Step: Launch Your Account as a Walmart Seller
Before jumping directly to the “How-To’s” of becoming a Walmart Seller, we first need to understand the requirements of doing so.
“Walmart is a reputed platform and exclusivity is an indispensable part of its reputation. Meaning, there are several requirements and prerequisites that you need to fulfill before you can apply to become a seller.”
So if you’re seriously considering Walmart as your next platform, check out the following criteria:
If your product assortments bring value to the buyers at a moderate and competitive price, then you’re surely an excellent match for Walmart. You can check out these instructions in detail when you start your registration process; it’s all there on the Walmart form.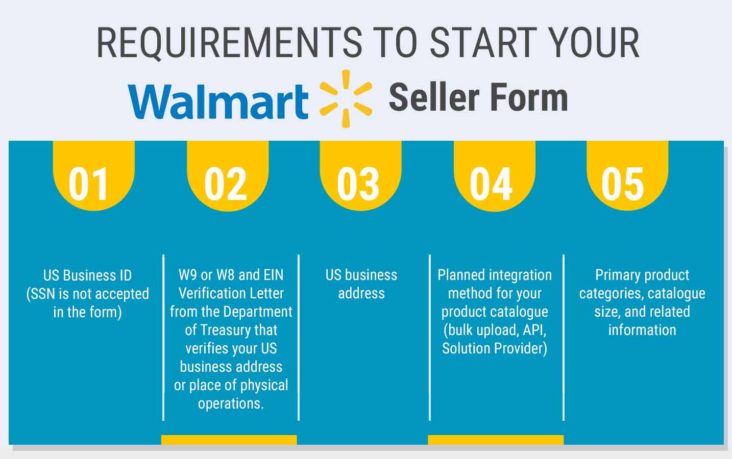
Now that you’ve read about the requirements to become a Seller on Walmart and fulfilled them, you can take a look at 6-steps.
There are two ways to start your Seller journey at Walmart, you can-

To start Walmart’s onboarding process, you need to first apply for approval/account creation.
For this, you’ll have to fill a Walmart marketplace application form- provide the details and then wait for an approval email from Walmart with further information about your Account. This usually takes somewhere around 15-20 minutes.
If you don’t want to get into the mess of doing everything yourself, it is crucial to start Walmart’s Onboarding Process from this page. It is essential to start here to ensure that CedCommerce can be your Solution Provider.
Once you finish the form, click on Start Application to become a seller on Walmart.
Once you receive details regarding your account, start the process of filling your registration form. It is recommended to complete the whole application (on a laptop or tablet) in one go; the procedure hardly takes over 10-15 minutes.
“Google Chrome is recommended for completing the form. Do not close the browser tab in the middle of the process. You may lose the progress made.”
The Registration process of Walmart consists of 5 sub-steps:
Let’s explore each of these sub-steps.
In this step, you have to create a username and password to access the Walmart Seller Center. Your username (which will be the same as your email address) will be auto-filled based on the details you provide in your Marketplace Seller application form.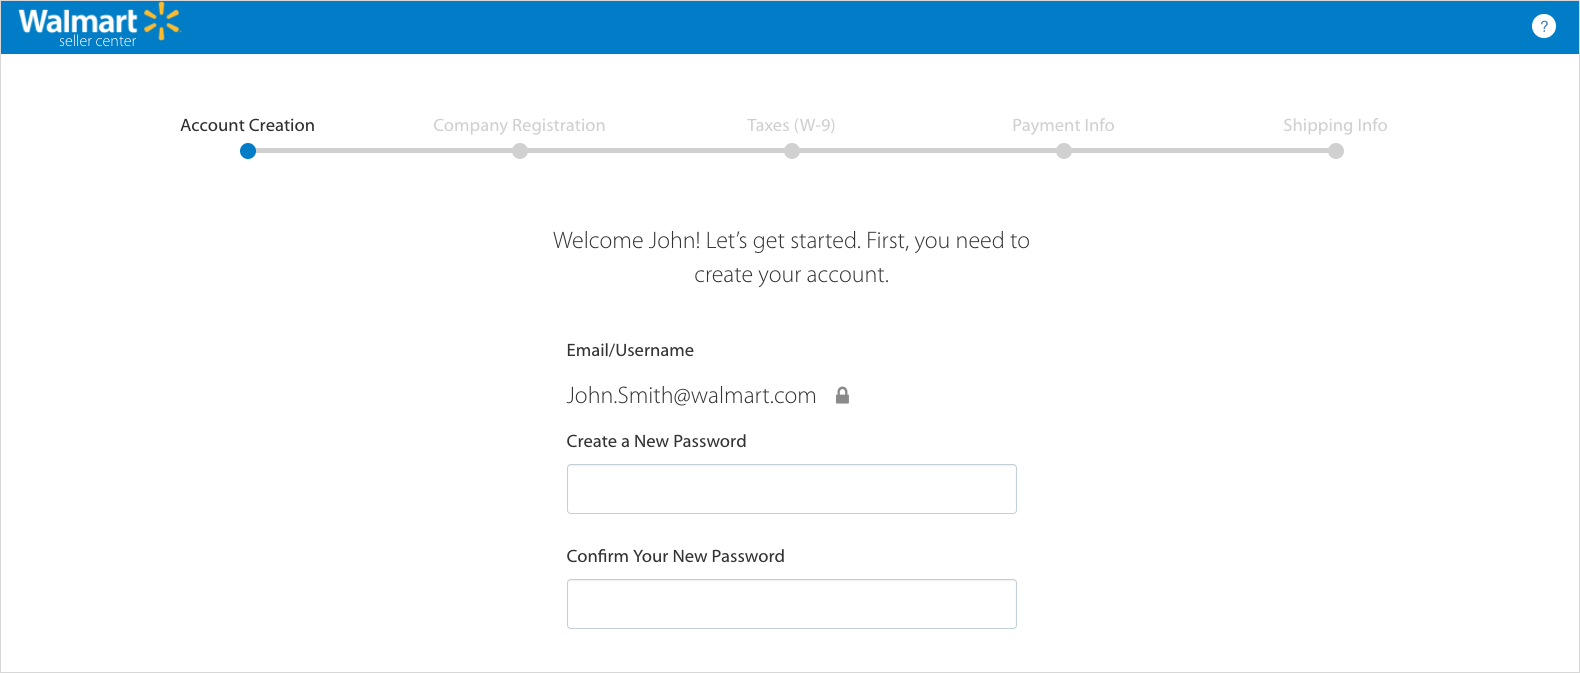
Make sure you complete this process in one go, or you will lose access to the seller center. Once lost, it won’t be possible for you to restore your account, so caution is warranted.
After Account Creation, you will see a legal agreement titled “Walmart Marketplace Program Retailer Agreement”. Read it carefully and check the box at the bottom to declare your agreement. Remember, this is a legally binding document, so make sure to press agree only when you’ve understood the undertaking.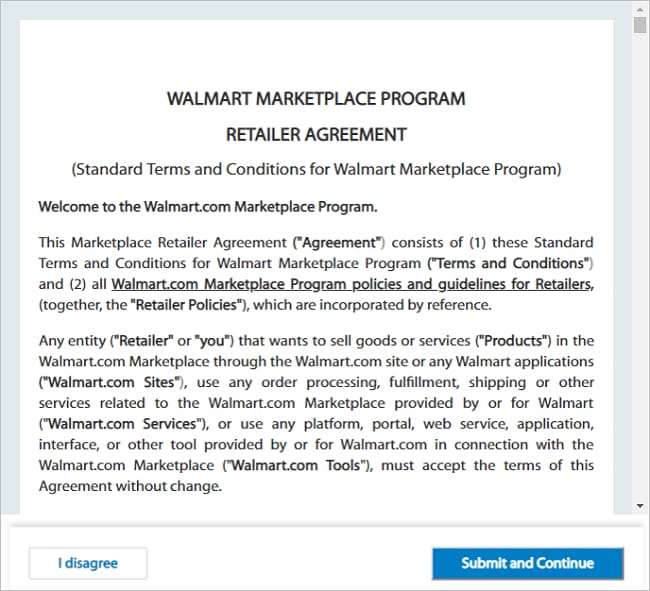
In this step, you have to provide your company’s information so that Walmart can create your Seller Account.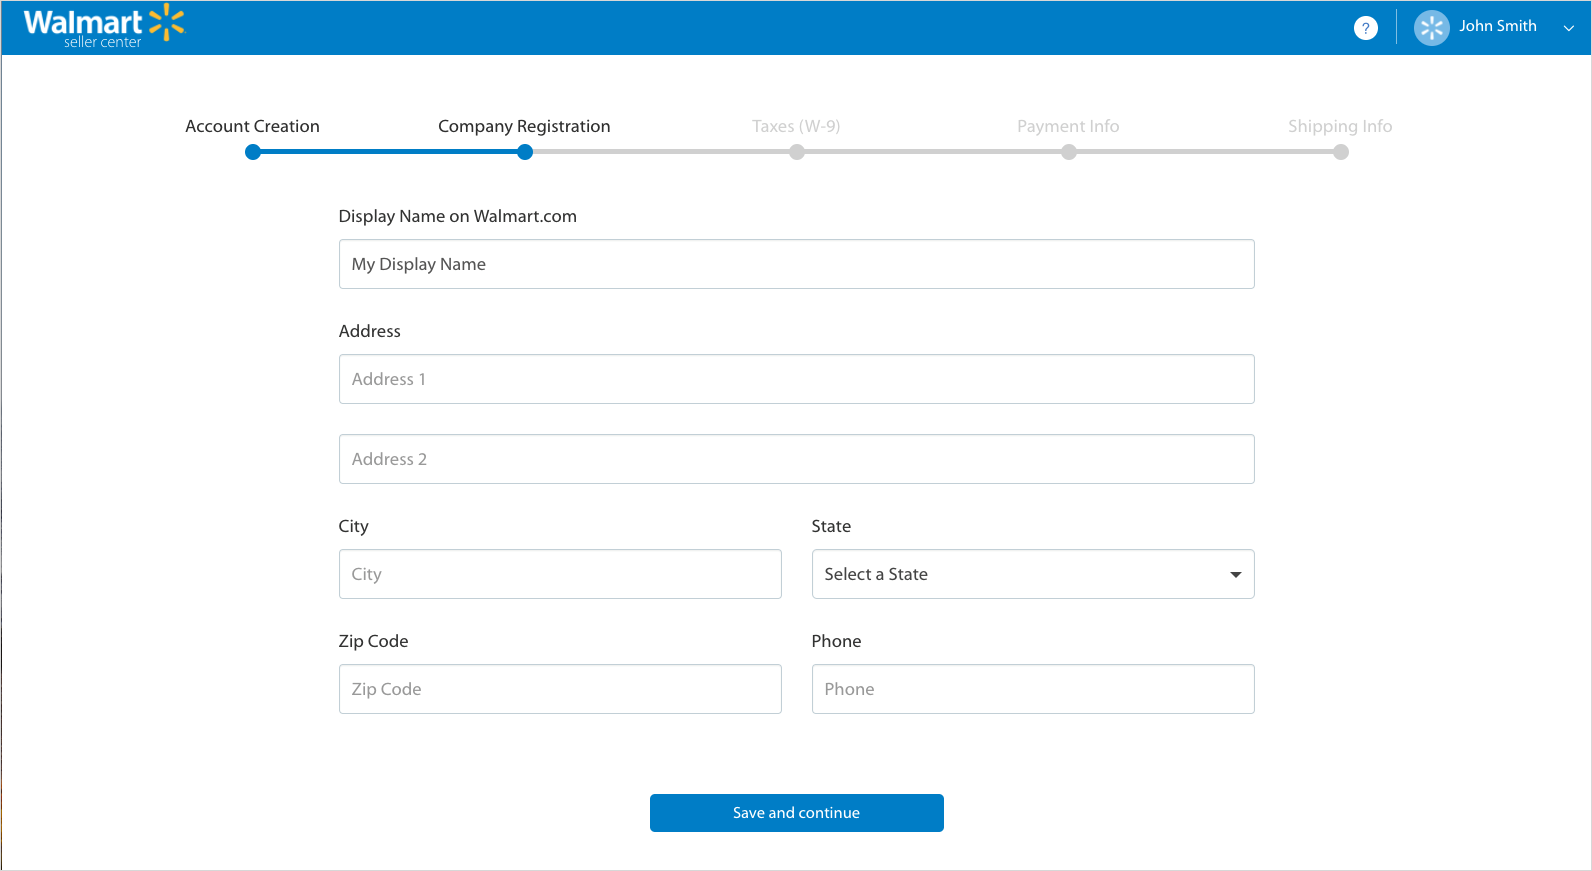
You need to fill out the following details to complete this step:
Walmart requires sellers to provide a W-9 form for tax purposes. You’ll need to fill out the required fields, i.e. your name, address, and TIN (Taxpayer Identification Number).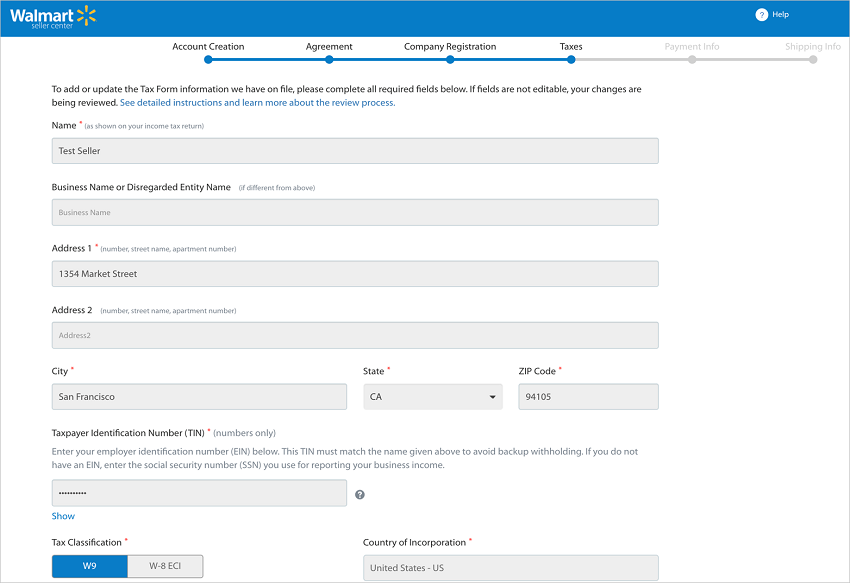
Filling out tax-related information is a breeze at this point. So, avoid unnecessary hold-ups by providing accurate details- the same as are mentioned on your tax forms.
Also, you will find some boxes in the form disabled. This means, any changes pertaining to said boxes cannot happen at this point and will remain the same for all the stages of the form. However, once the form is complete and your account is live, it is possible to apply for a change.
Walmart has partnered with Payoneer and Hyperwallet to process the payments of Marketplace partners. To receive your payments from Walmart, you must register with either of the two payment platforms.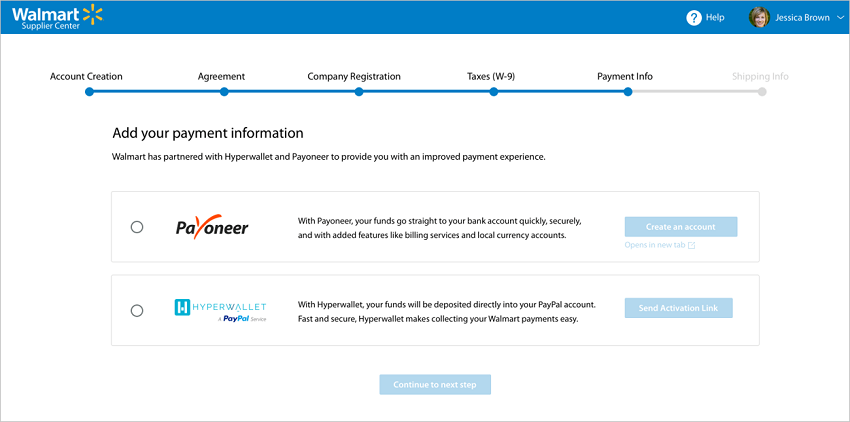
Note:
Once you’re through setting up your payment info, click “Continue to Next Step.”
At this stage, you will have to configure your shipping price models for all your Walmart products. Also, select your product pricing models on the following basis:
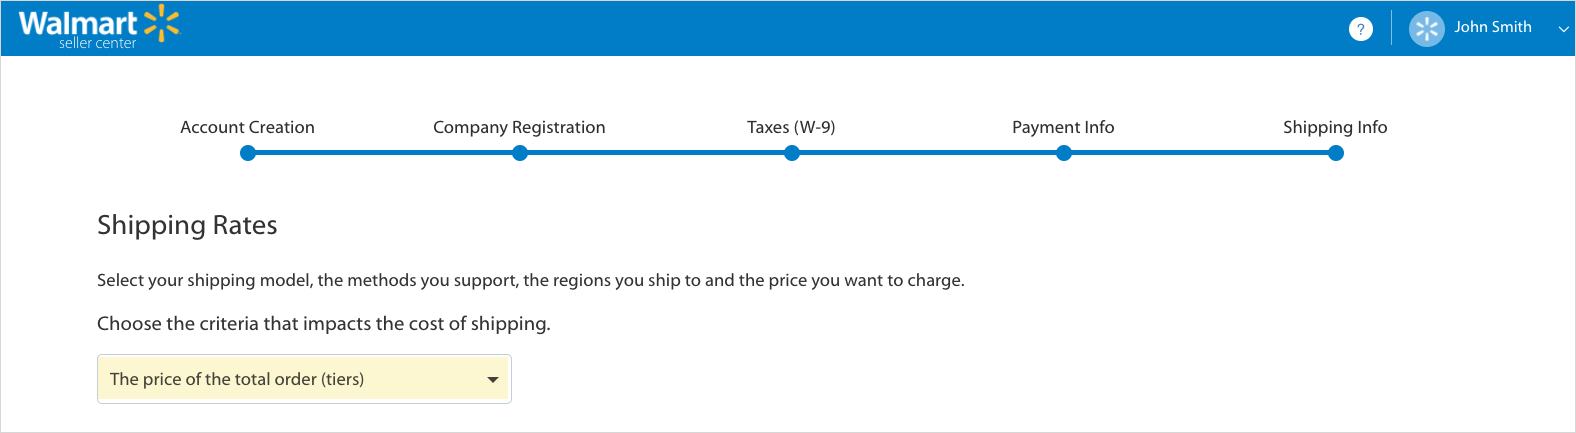
Select Shipping Methods and Regions:
Next, you need to select the default shipping methods and regions that you will be supporting for all your Walmart items. Default Shipping methods are Value, Standard, Next Day, and Expedited.
In each Shipping method, select the shipping regions you ship to by using the given toggle under the ENABLE column.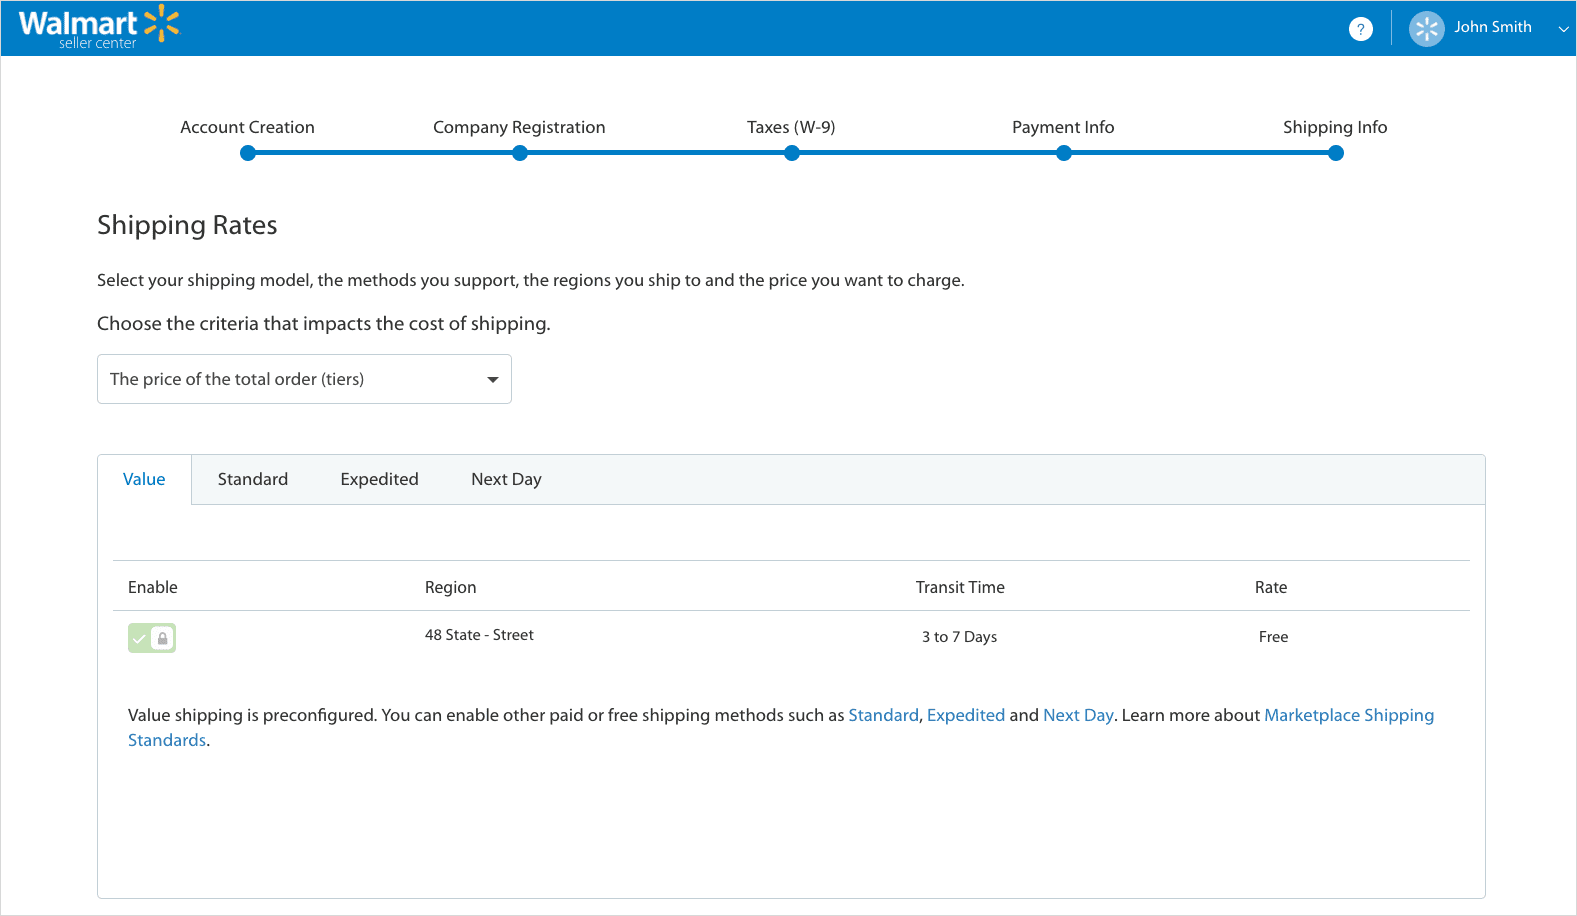
For all the Shipping methods and Region combinations, set your minimum and maximum transit time (in days) or the price that you will charge.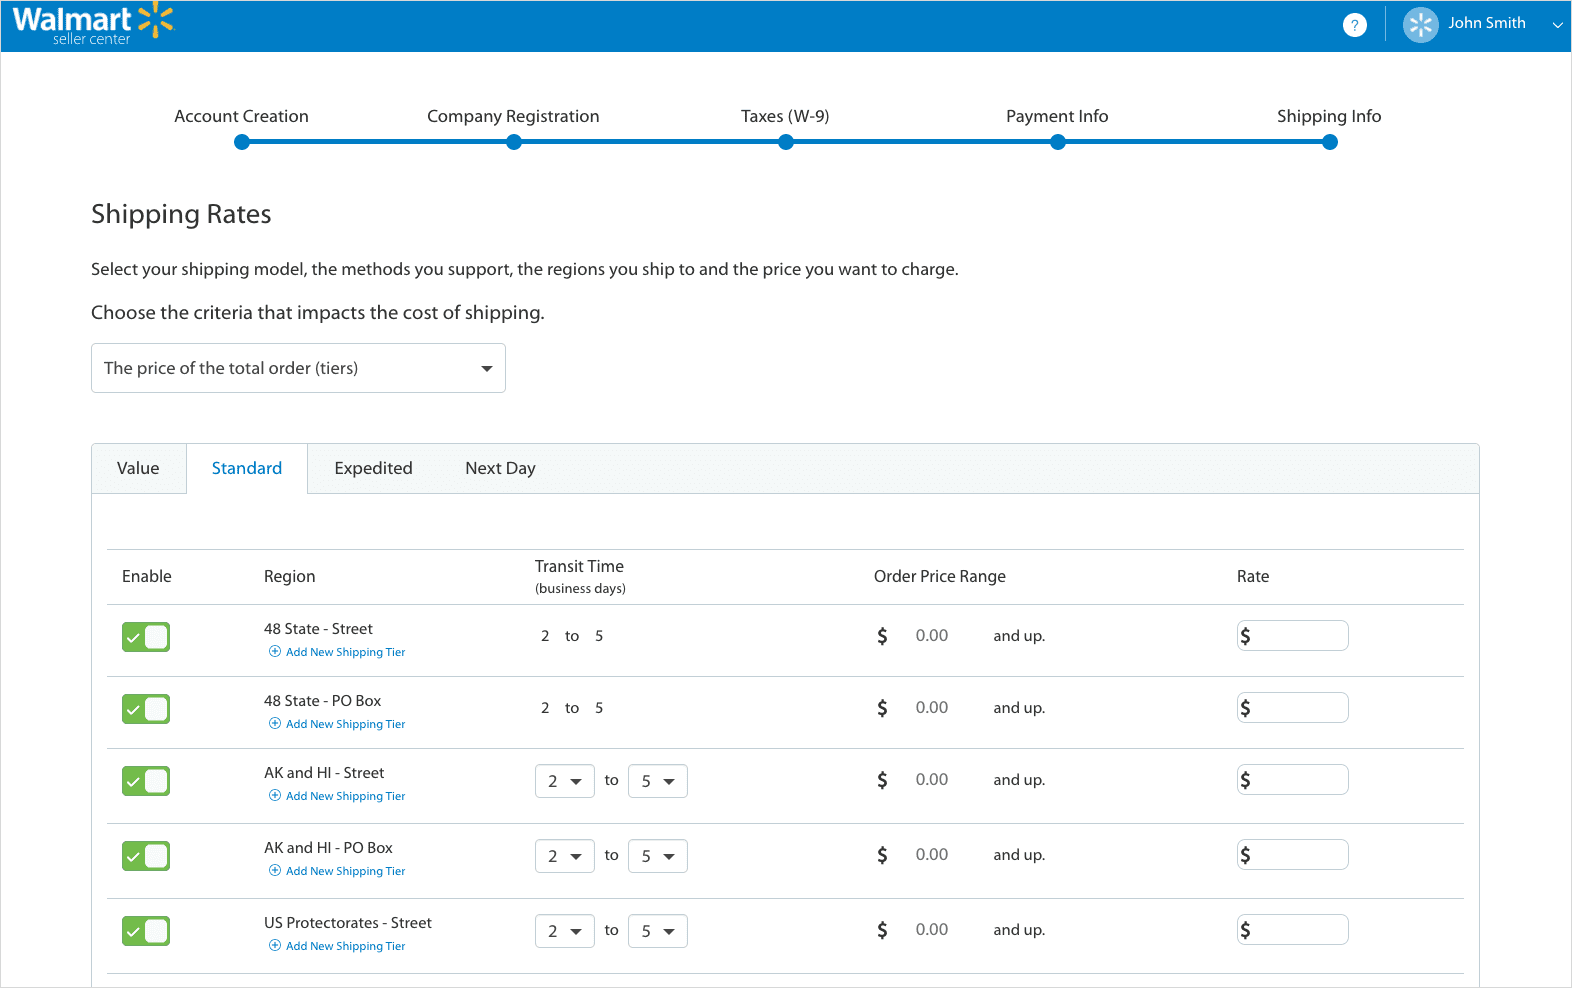
Click Submit after providing all the above details.
After this step, you will be logged in to the Walmart Seller Center automatically, and from there, you will need to finish your Launch Checklist.
“Shipping types preferred by Walmart include ‘Next Day’, ‘2-Day’ and ‘3-Day Deliveries’. In case orders cannot be delivered the Next Day, it would help your ranking if you could ensure 2-Day Delivery or 3-Day Delivery on the entire order.”
The third major step of registering as a Walmart Marketplace Seller is to complete the “Launch Checklist”. This list outlines the requirements to launch your account on Walmart.
The list will be made available to you only after you’ve completed the Partner Profile and have gained access to the Seller Center.
The first checklist item “Complete your Partner Profile” is a particularly important one; since, this is the public page from where customers will find your company name, description, company logo, policies, tax information, etc.
The main steps of this first item on the Checklist are:
Let’s explore each of these points.
Here you need to update the details of your company. Provide your Display Name, Logo, and a Short Description of your company.
Here you need to provide details about your Customer Service. This includes Customer Service email address, timings, and customer service contact number.
In this section, you can easily update information about people from your organization who look after the various aspects like technical, Customer Service, Content, Performance, and Shipping of your business.
Provide the Shipping details like Shipping rates, Shipping schedule, and Shipping policy here.
Here, you need to set up Return methods, Return rules, and Return fees.
Describe your privacy policy in this section.
You need to provide all the information about the taxes like Nexus, Shipping Tax Codes. Also, write Sales Tax Policy here.
After you complete Partner Profile, the Progress Bar in the top-right corner will reach 100%. As soon as you complete all the steps, the checklist item will be checked off as complete.
At this step, before setting up items, choose an integration method that you will be using to sell your products on Walmart. You have the following four options:
Once you finalize an integration method, you need to perform the following steps:
To update inventory using the Inventory Spec, click Bulk Updates under Items & Inventory.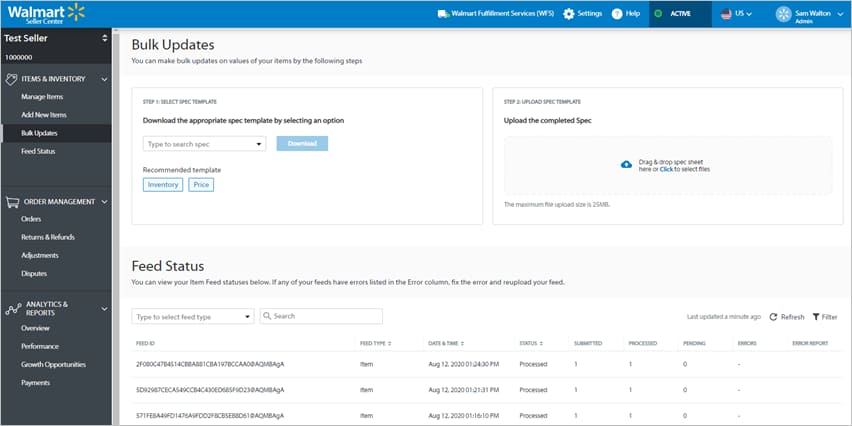
Under the Select Spec Template, select Bulk Inventory Update from the Select Spec dropdown, and then click Download.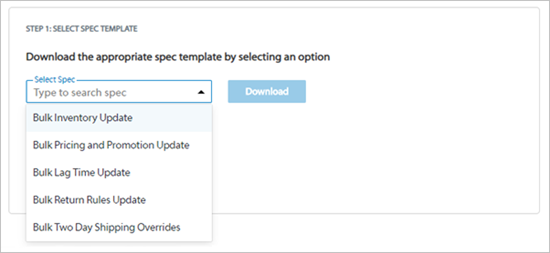
In the Excel template, fill the two fields:
Then, Save the file.
Upload Completed Spec
Return to the Bulk Updates page, and upload the completed file.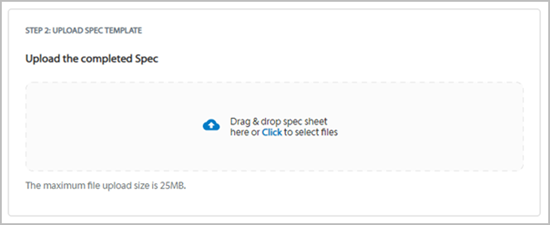
From the Select Spec dropdown, choose Bulk Inventory Update to continue.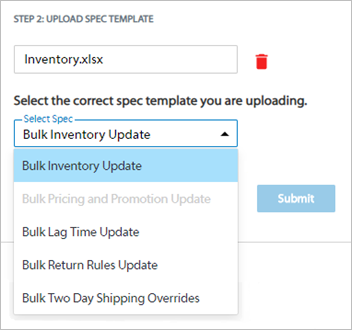
Finally, choose the Distribution Facility from the dropdown menu and click Submit. Don’t forget that you can only upload inventory for one facility at a time.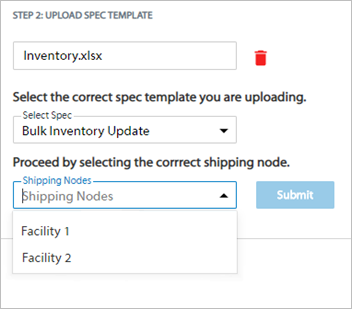
At this step, fulfill the following criteria:
When you complete all the steps, click ‘Ready to Launch’.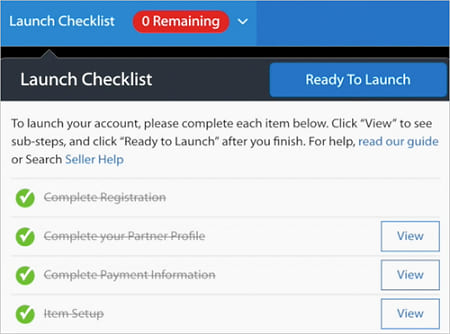
Next, you will see a popup that asks you to confirm that you are ready to launch. On clicking Confirm, a message is sent to the Walmart team. The team evaluates your profile. If everything is found to be correct, the team will send you a message that your application has been approved. Your catalog will be made visible approximately 48 hours after you receive this message from Walmart.
What we’re saying is:
The onboarding and application process at Walmart can be befuddling for third-party sellers. However, with the support of a third-party solution provider and an expert integrations team, you’ll be ready to launch in no time.
These steps should answer all your questions about Walmart’s onboarding and registration process. However, if you’re still confused about How to sell on Walmart.com? Or What are the steps to sell on the Walmart marketplace online, get in touch, and we’ll provide solutions to all your problems!
Read more:
Walmart Embraces Amazon MCF: A New Era of Cross-Platform Fulfillment for eCommerce
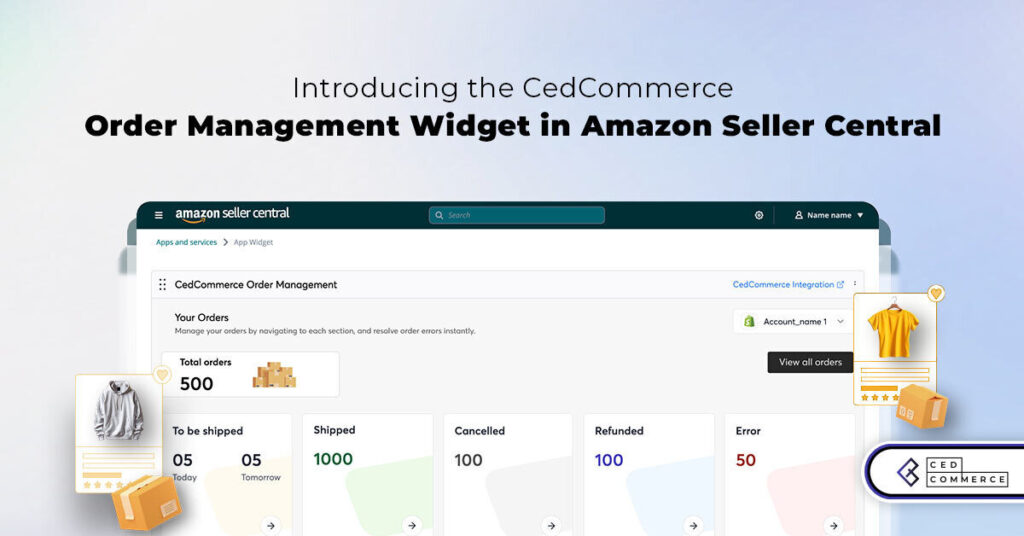
Order Management Redefined: A Centralized Solution for Amazon Sellers

Maximizing TikTok Shop’s Regional Compatibility for US, UK, and EU Markets
Understanding U.S. Tariffs in 2025: What Sellers Need to Know and Do
Walmart’s Search Algorithm Decoded: How to Rank Higher & Sell More
TikTok Gets a 75-Day Reprieve in the USA as Trump Signals Hope for a Deal

TikTok Shop Introduces Category-Based Benchmarks for Product Listings – What Sellers Need to Know
Amazon FBA vs. FBM: Which Fulfillment Method Is Right for You?

Amazon Launches Another AI Tool for Sellers: AI Generated Product Enrichment
Top 10 Selling Items on eBay in 2025
Amazon launches AI Powered ‘Interests’ Feature to Improve Shopping Experience

Is TikTok Staying in the US? The State of TikTok Ban

Best Buy coming back to the US, Marketplace Relaunch and New Opportunities in Store!
Miravia PrestaShop Connector: Built for Smart Sellers
Walmart Launches “Wally”, AI Assistant For Merchants

TikTok Shop to Start Business in Germany, France, and Italy

TikTok Shop Surges as Americans Spend $700 Annually, Defying Regulatory Pressures

Amazon’s Longest Prime Day Ever: What You Need to Know

eCommerce Growth in the Netherlands: A 5% Surge in 2024 with Bright Prospects Ahead
CedCommerce Launches Shopee & Lazada Integration for WooCommerce on WordPress.com