
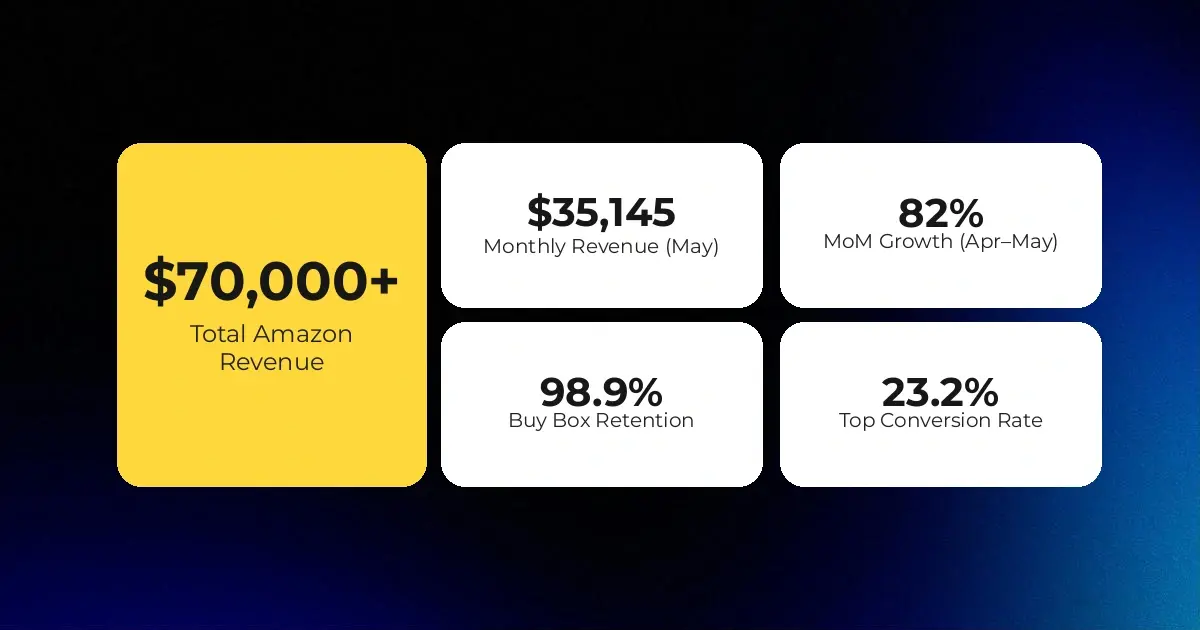
From $0 to $35K Monthly in Under 60 Days: How CedCommerce Built Milky Mama’s Amazon Channel
Reading Time: 3 minutes Section 1: About the Client Milky Mama is a leading maternal…
Running short of time? Get PDF of the blog in your mail.
Selling online can be fun if you like to test your own limits and have a knack for creativity. As a merchant, most of the time, you are occupied in managing your Shopify store, building relations with customers, and exploring untapped opportunities. Through this article, we intend to tickle the photographer in you so that you can build your DIY product photography studio. Yes, your product photographers can make or break the deal. Find out more in our eCommerce photography guide – from basics to planning our photography workflow.
While upgrading your photos, don’t forget to create collection pages. The festive season is on its way, and while working from home, you can utilize your time to hone your photography skills and make it work for business. Here is what we have got for you during the session –
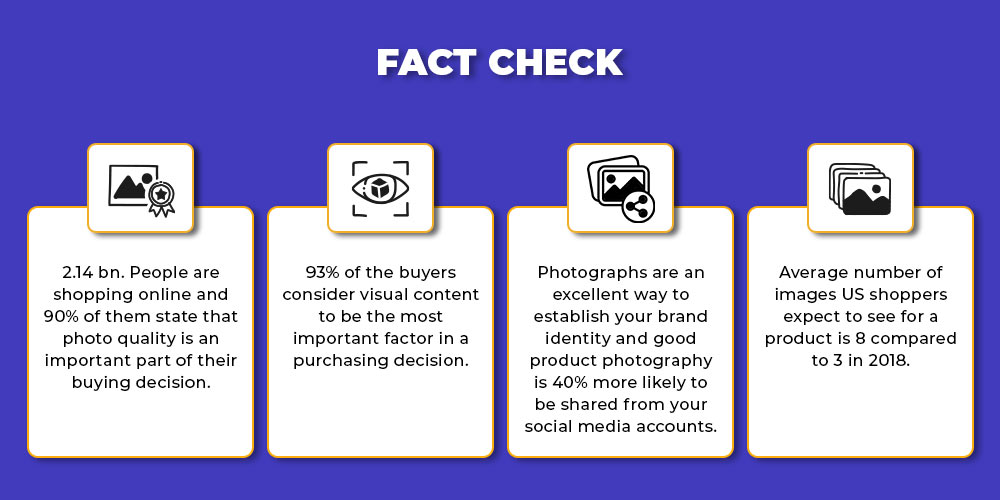
Shoppers can’t touch the products they buy online (unless they receive their parcel). By showcasing your products flawlessly, you can streamline their buying journey. Captivating product photographs and unique collection pages is the key. When you group your products into a collection, you make it easy for visitors to shop. The festive season is about to come – a little brainstorming on this topic can help you create trending collection pages.
Let’s say you are selling t-shirts, shoes, trousers, and shirts for meant and women. You can pair casual shoes with t-shirts and create a party/outdoor collection page. Or a Back-to-office one, maybe! With a punch of product photography and a collection page, you can sell better with Shopify. Feel free to consult our Shopify experts to create unique collection pages for the festive wave!
 Mind-boggling, isn’t it? Good product photography can be the reason for the success of your store, and Shopify duly understands this. Shopify’s online store 2.0 comes with the freedom to showcase your products in the most creative forms. Your DIY product photography workflow is all you need to rock the stage during this year’s festive season. Global brands are leveraging Shopify’s platform for the same reason.
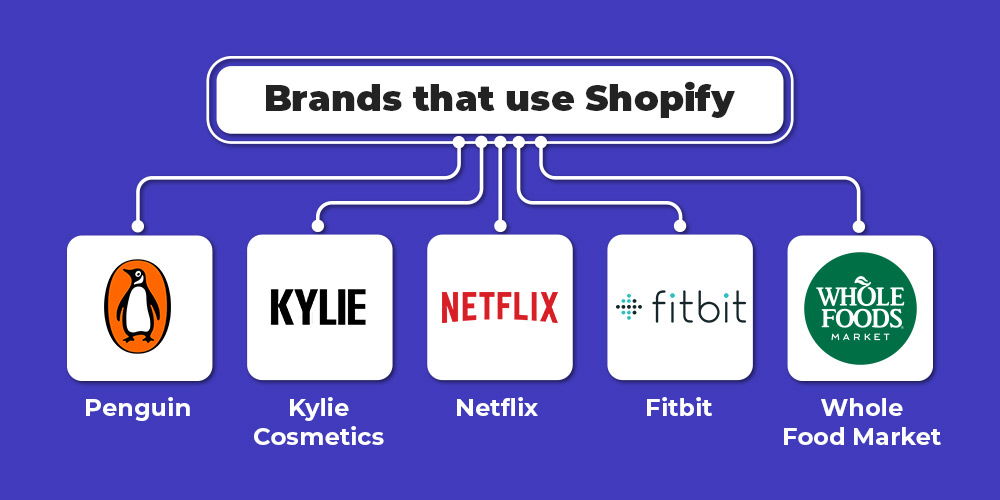
To click great product photos, you need to stop outsourcing this work and rather take the pleasure to do it yourself! When you set up your DIY product photography studio, you can click, edit, and transform photos into sellable snapshots in your Shopify store.
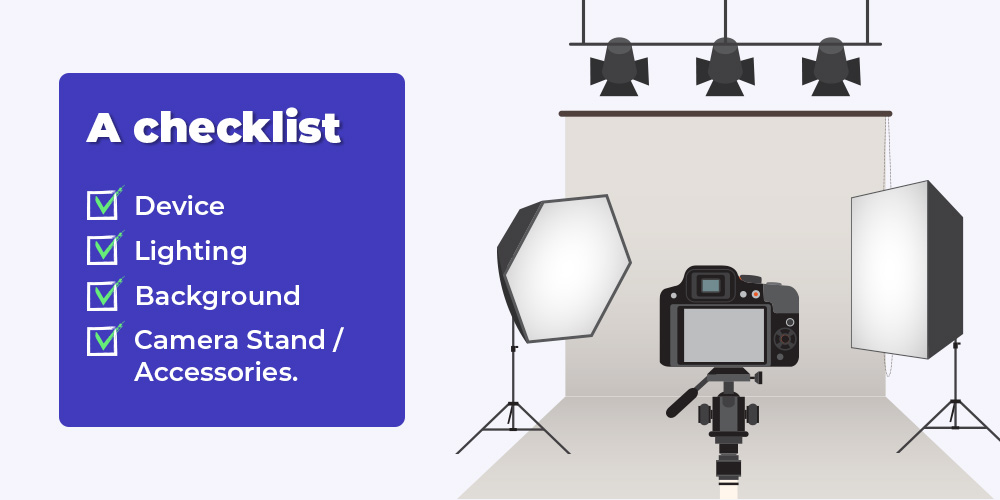
This eCommerce photography guide is chopped into easy-to-understand and approachable steps to set up your in-home photography studio. Some merchants pursued DIY product photography as a hobby and are now doing wonders in their niche. Let’s begin with the basics –
If you want to click photographs that sell, you should treat your products as influencers and market them with unique messages, just like the influencers plan their shoot and spend hours clicking great pictures. You should also plan and organize your product photoshoot. Spend at least a day in your studio and experiment with lighting, camera angles, and the product itself to capture pictures that focus on products and their benefits.
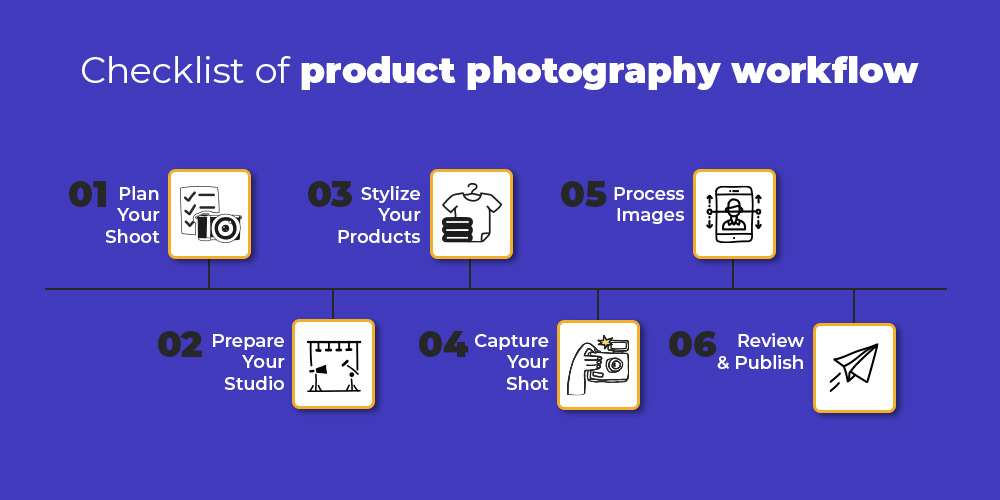 1. Plan –
Before lights, camera and action – you should plan out your photoshoot session. Planning is an important facet of the eCommerce photography guide. Depending on your product catalog, you should book slots at least a month before. Prepare a daily planner and jot down all the ideas that cross your mind related to creative product photography. Here are some questions that you can ask –
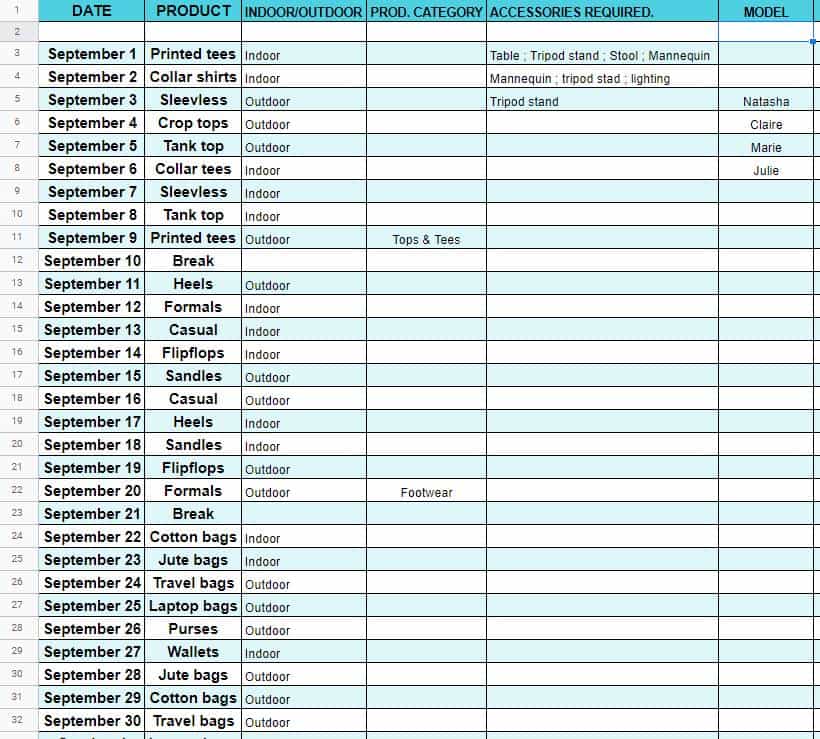
DIY product photography calls for creative ideas and a hyperactive approach. Planning the photoshoot will smoothen up the workflow. Let’s say you are selling tops, tees, footwear, and bags in your Shopify store. Here is how your DIY product photoshoot planner should look like –
 2. Prepare –
Building your indoor photoshoot is interesting. Do you have a vacant garage or a room? Well, it is time to convert that vacant space into your product photography studio. You can refer to Pinterest to get an idea about how merchants have built their in-home product photography studios.
While you are building your studio, you need to be extra careful about lights. Who doesn’t like to capture shots under natural lights? But it would help if you didn’t ignore the impact of artificial lighting on your products.
When you prepare your DIY product photography studio, you need to prepare the space to capture shots from your phone and a professional camera. Photos from smartphones and photos from a professional camera require 2 different approaches. Your in-home product photography studio should have a careful mix of both approaches.
Before you start clicking pictures of your products, you need to run a check on them. When the real influencers try not to be clumsy in front of the camera, why should your product carry flaws during the time of photoshoot?
Remove any tags, labels, and look for damages. Just imagine the merchants who deal with furniture and fixtures. Before the photo shoot, they have to polish the merchandise and prepare a suitable background to ensure that the photograph and product complement each other.
The more you stylize your products before the shoot, the better the final images will be. Even the most creative product photography goes waste if the photograph has flaws rather than features. You can use mannequins and models during the photo shoot if you are dealing with apparel.
Shopify AR is an amazing way to capture a 3D view of your products. Creative product photography is all about bringing your products to life, and with Shopify AR, you can add an extra pinch of liveliness to your products.
In-home product photography is all about finding frugal ways to set up a scene and capture great pictures. No eCommerce photography guide can teach you how to unleash the photographer in you. Just keep experimenting from time to time.
Everything that you did so far ensured that your and backdrop is all set to get clicked. Now is the time to start clicking pictures, just like you click a couple of photographs before posting that one picture on social media. In the same way, you need to click different photographs of your products. Experiment with lights, backgrounds, and the theme.
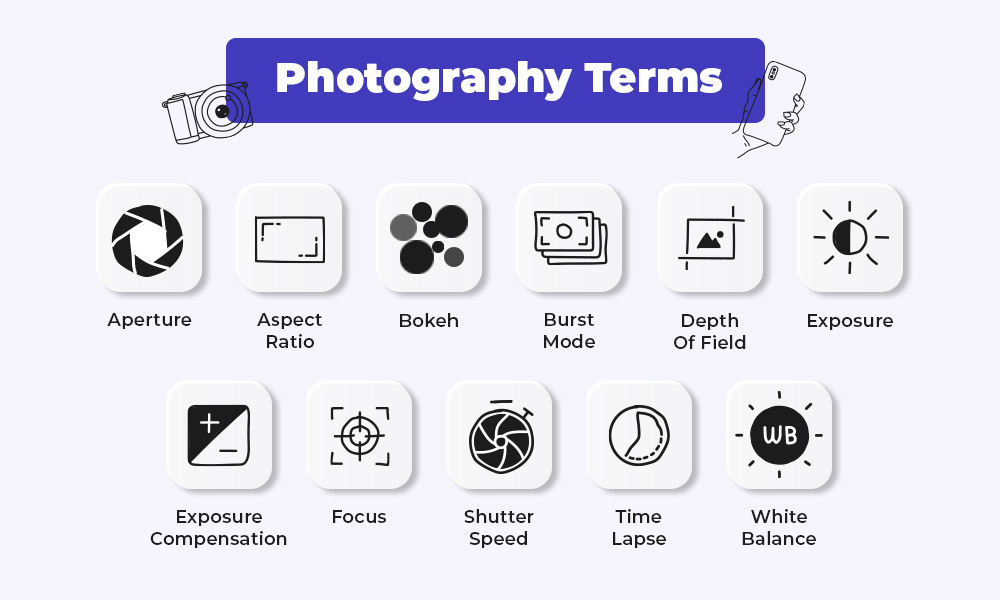
If you can highlight prominent features during the photoshoot, it would be great. Experimentation is the key – take as many test shots as possible. Play with camera settings, background, lighting, focus, and see how product images do the talking.
 For every product, you should have at least 10-15 images so that after rendering and editing them, you are left with the best of the images.
The first thing you should do right after clicking images is to get a proper backup. Processing images is all about refining and improving your product images and making them ready for upload.
Maintain uniformity across all of your photographs. Make sure you have uniform lighting, aspect ratio, and frame for specific product categories.
Check out product images of Netflix Shop – Most of the time; they have used a white background. They have product images with different camera angles and focus. However, all the images have uniform lighting, smoothness, and a careful balance of natural light and shadows.
This is known as batch editing when you select all the images belonging to one category and apply some common changes. Batch editing is followed by individual editing when you make adjustments to your individual product images.
You are just one step away from uploading your hard work. When you review photographs, make sure that they are uniform and just the way you imagine them to be. You can also create unique collections of your products to stand out from your competitors.
If you’re dealing with footwear, you can create unique collections for casual shoes, formal shoes, and likewise.
Clicking photographs is just one part of the eCommerce photography guide. To ensure equal visibility of your products, you should create unique collections in your store.
You can also discuss the scope of creating unique collections with our Shopify experts. Our team is known for creating, optimizing, and promoting collections pages in the most creative manner.
You should include smartphones in your DIY product photography studio and take amazing shots. It would help if you were a little careful about the framework and angles. Most store owners know the basics of smartphone photography, but here are some tips that will raise the bars of your pictures taken by smartphones –
Pictures taken in low light are not recommended as good product images. Lighting and camera settings determine the outcome of the entire shoot before it is even started. Your DIY product photography studio should have a mix of natural lighting (a window space or a ventilator) and artificial lighting )white lights, LED bulbs, etc.).
Spend a good amount of time finding the right lighting condition for your product. There is no quick fix. Rather it will be a series of trial and error. But once you get hold of how much lighting you need, the rest is easygoing.
When shooting next to a window, you need to ensure the sunlight – figure out the best time to click photos with natural sunlight revealing your product. Avoid direct sunlight. It might create shadows. It would help if you were patient enough to understand the best aspect ratio for your product’s photoshoot.
Artificial lighting, however, gives you more and better control during your product photoshoot. But managing studio lighting is tricky because you have to manage angles and light-diffusing techniques for which these lights are known. Before including artificial lighting in your photoshoot studio, you need to study the lighting setup thoroughly.
Tripods are like oxygen to your smartphone photography, and you must keep at least 1 tripod of every size. These stands are great when you want to click products that require a wide frame and capture super-stable and highly focused images of your products.
Backdrops of backgrounds should compliment your products. Cluttered backgrounds are distracting and draw attention away from your subject. If you are clicking such pictures for your eCommerce products, they will create a terrible impression.
Depending on the size of your products, you can choose the size of your backdrops. Portrait subjects would typically be pulled at least 3′ away from your backdrops to prevent shadows.
Here’s a foolproof guide on how to set up your backdrop.
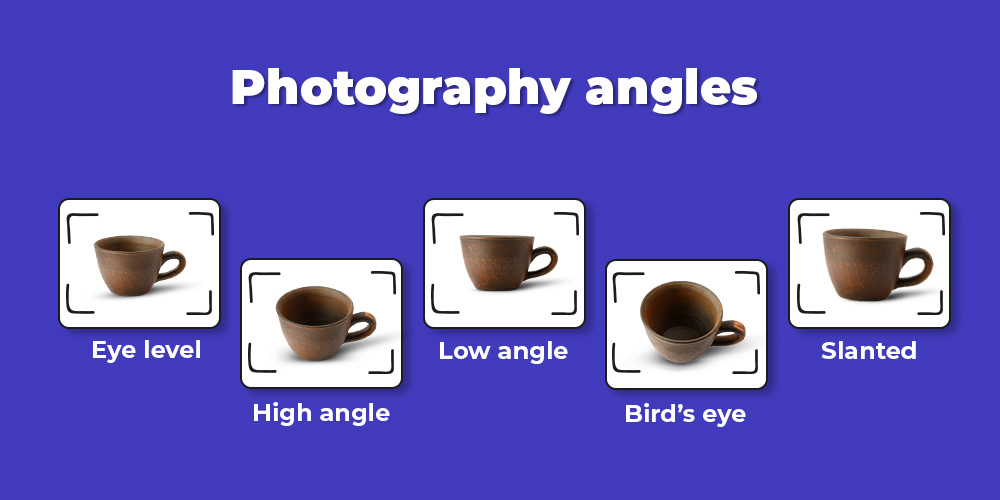
The best way to find out a suitable camera angle for your products is to study the existing images of your competitor’s products. In eCommerce product photography, some angles work better than others.
The key here is to help shoppers see your products from different angles and ways. An all-around view helps shoppers to envision themselves wearing or using your products. It is also important to include close-up shots of your products. Such shots let you capture the minute features of your products, which otherwise would have been ignored. All in all, there are five prominent camera angles that you can try –
We are about to witness some of the craziest celebrations, and shoppers will be on a shopping spree once again! It is high time to improve your store’s conversion rate by setting up your in-house DIY product photography studio so that you can upload pictures that are worth a thousand smiles.
So, what are you waiting for? Get up, grab your smartphone, assemble your products, open this eCommerce product photography guide, and click pictures. Once you are done, you can consult Shopify experts, and we will help you create unique collection pages for your Shopify store.
All the best!
Reading Time: 3 minutes Section 1: About the Client Milky Mama is a leading maternal…

Reading Time: 1 minuteIntro Summary Shopify Scripts stopped executing entirely on June 30, 2026. Merchants…

Reading Time: 9 minutes Your buyers are not shopping in one place anymore. They search…
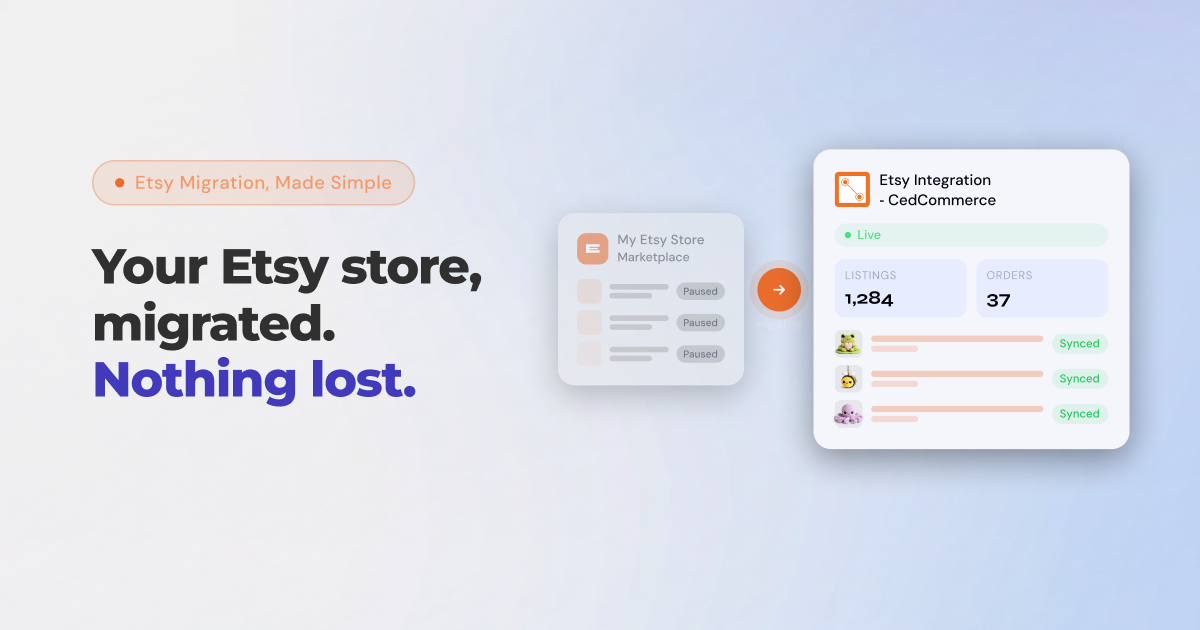
Reading Time: 8 minutes If you’ve been running your Etsy store through Shopify Marketplace Connect,…

Reading Time: 12 minutes From Etsy policy changes, such as fees and payments, to creativity…

Reading Time: 11 minutes What if reaching hundreds of millions of Amazon customers didn’t mean…

Reading Time: 2 minutes Amazon is rolling out a significant update that will directly impact…

Reading Time: 2 minutes When OpenAI confirmed a 4% transaction fee for Shopify merchants selling…
Reading Time: 1 minuteShopify has announced that offline payments now work across multi-entity Shopify Payments…

Reading Time: 13 minutes Print on demand on Etsy is no longer a low-effort side…