
Adobe Sees 520% Jump in AI-Assisted Holiday Shopping
Reading Time: 2 minutes Key Highlights AI-driven traffic to U.S. retail sites will increase by…

Running short of time? Get PDF of the blog in your mail.
To add custom attributes to vendor profile you can use our Vendor Attribute Addon. This blog will define the process of adding custom attributes to Vendor’s profile with an option to display them on vendor registration page as well. First let us understand the use of Vendor Attribute Addon.
Many a times a case arises where the admin wants to retrieve some information from his vendor like their Identity Card Number, Marital Status, etc. In such a case, you can make use of Vendor Attribute Addon which will allow you to add custom attributes to the vendor’s profile. These attribute can be of following types:-
Now let us see how the attributes can be added by the admin and where will they appear at frontend in the vendor panel.
To add the attributes on the vendor profile page, go to the admin panel and select CsMarketplace > Vendor Attribute.
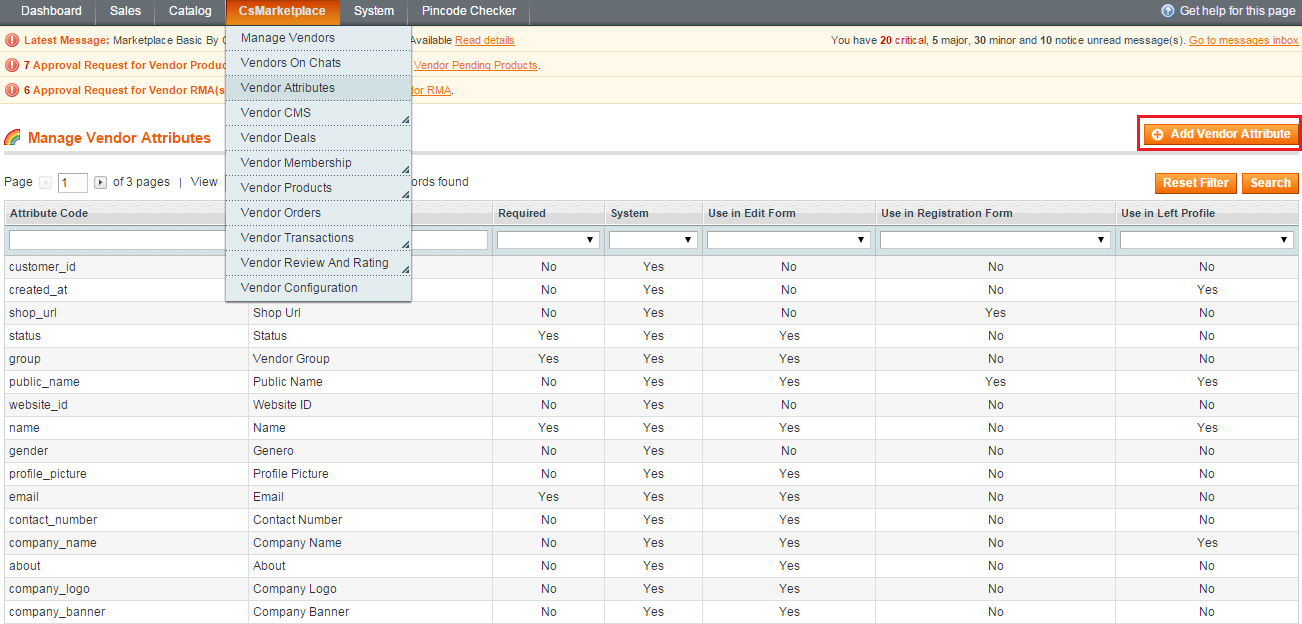
Click on the “Add Vendor Attribute” button to add a new attribute for the vendor. Now enter the attribute code (it should be a unique code with no special characters except underscore), Vendor Input Type for Store owner (text, multiselect, dropdown, file, image, date, yes/no and textarea), Default Value (if any), Unique Value (if any), Values Required (if any) and Input Validation for Store Owner (if any).
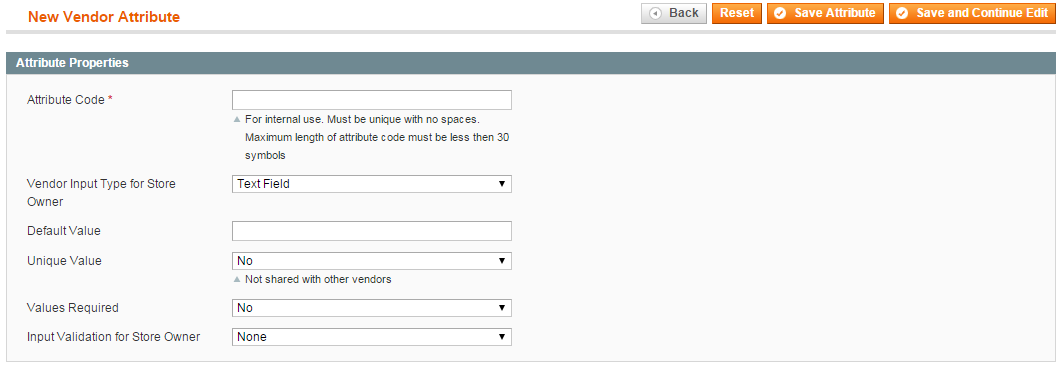
Now, if you want this attribute to appear on vendor registration page then select Yes in the appropriate field and provide its position (in numbers) where you want it to appear.

Now, if you want to display the attributes in the vendor profile edit form then select Yes in the “Use in Vendor Profile Edit Form” and specify its position (if needed).

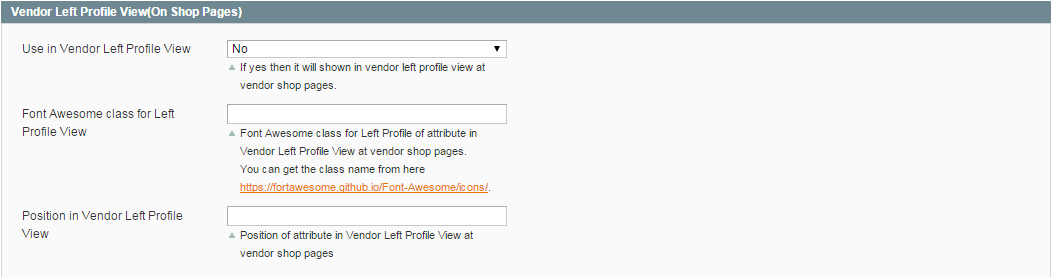
For displaying the attribute on the Shop Page in the Left Profile view, select Yes in the required field, provide its position and the font-awesome class if you want to display an icon next to it on the Shop Page.
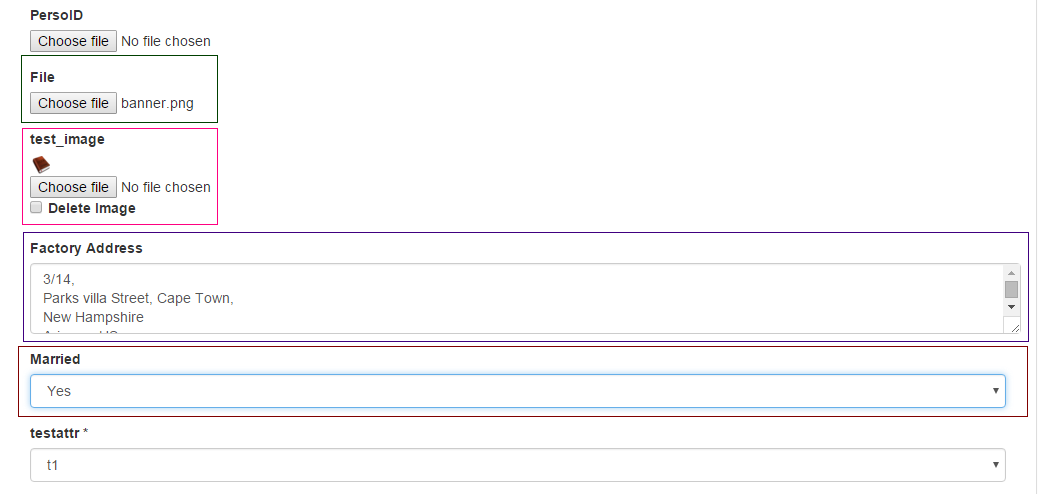
After saving this attribute if you view it at frontend in the vendor panel on the profile edit page, they will appear as shown
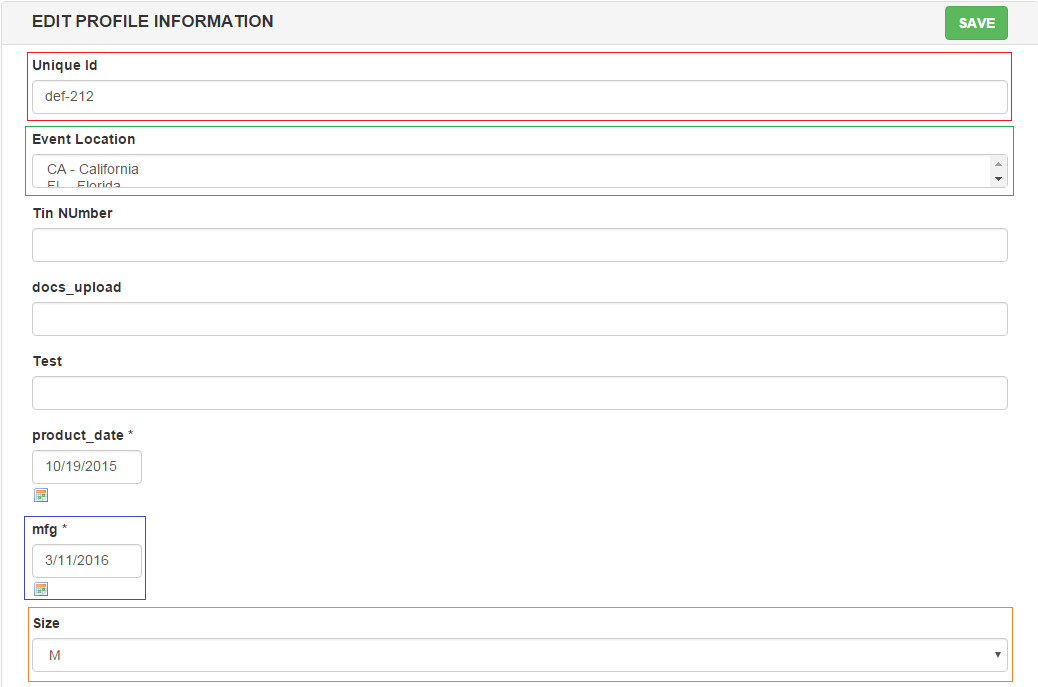
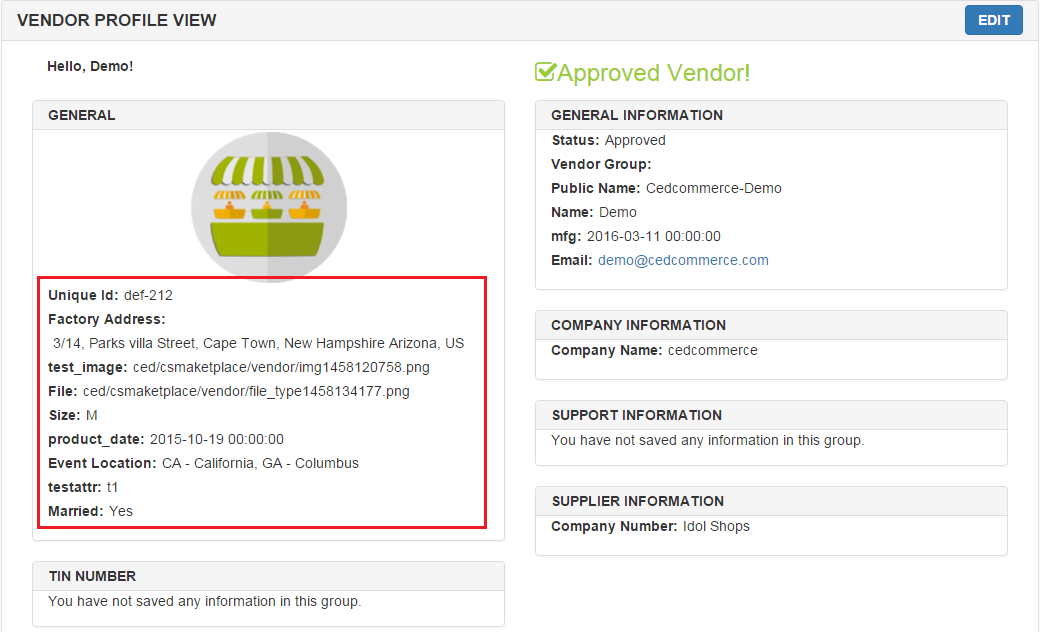
If we see on the profile view page of the vendor then all the custom attributes get listed in the General Section as shown
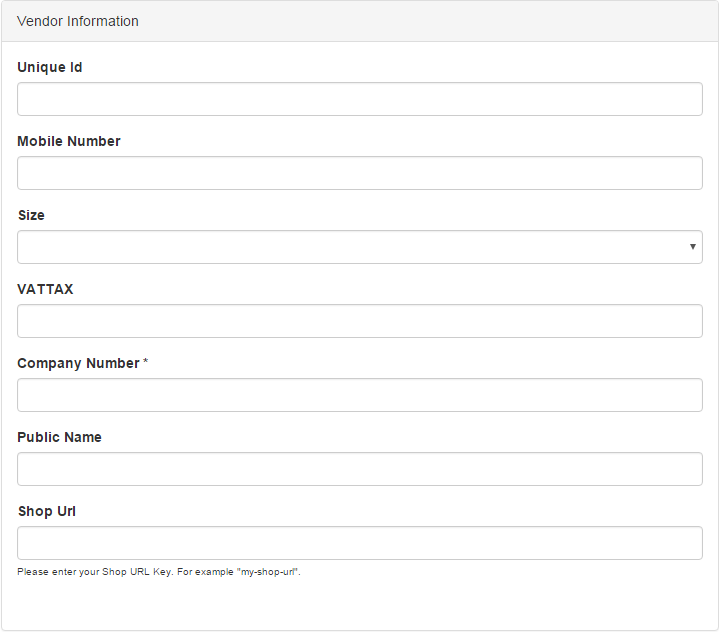
On the vendor registration page, the attributes will be shown as
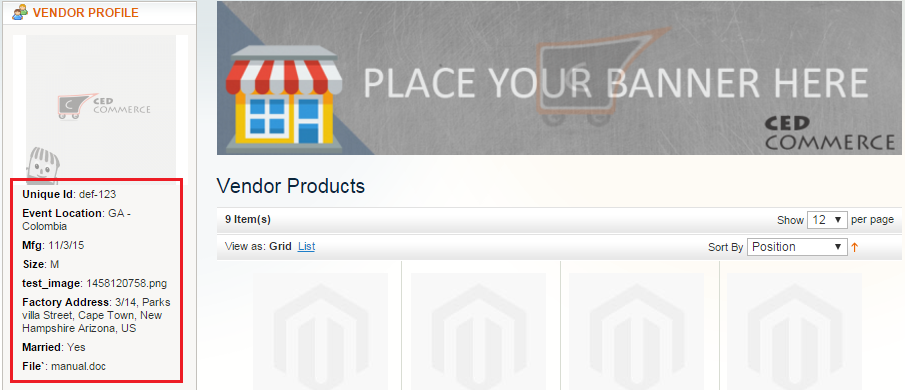
On the Shop View page in the Left Profile view, the custom attributes will be shown as
This was all about how to add custom attributes for vendors. This blog tried to explain all the scenarios of adding custom attributes to vendor profile or registration or shop page.
If you find this blog useful, please share your valuable comments and if you have any suggestions, please let us know.

Reading Time: 2 minutes Key Highlights AI-driven traffic to U.S. retail sites will increase by…

Reading Time: 2 minutes Critical security alert for Adobe Commerce & Magento merchants. Adobe has…

Reading Time: 4 minutes Magento is a powerful platform for eCommerce websites. However, with two…

Reading Time: 13 minutes By 2025, retail eCommerce sales are projected to account for over…
Reading Time: 16 minutes E-commerce is constantly expanding, with an accelerating pace of development in…
Reading Time: 3 minutes We at CedCommerce are happy to share some exciting news for…

Reading Time: 3 minutes Portland, Oregon [October 12, 2022]: CedCommerce is a leading eCommerce solution…

Reading Time: 3 minutes Prepare yourself with a list of the Magneto Integrations you’ve always…

Reading Time: 3 minutes Portland Oregon [September 5, 2022]: CedCommerce, a Magento marketplace solution provider,…

Reading Time: 4 minutes Have you heard that Shopee OpenAPI 2.0 has replaced the 1.0…