Magento 2 has an entirely different architecture in comparison to Magento. This blog clearly explains the structure of Magento 2 and also states the difference between the structure of Magento 2 and Magento 1. In the previous article (Magento 2 Widnows Installation/Magento 2 Linux Installation) we were done with Magento 2 installation , now let’s check out architecture of Magento 2.
Just like it’s predecessor Magento 1, Magento 2 also follows Configuration based MVC. Besides this, there are lots of new features and libraries are added in Magento 2 like Magento 2 now uses symphony autoloader, introduced jQuery support , etc.
Above image shows current magento 2.0 architecture which hopefully would remain same in future in the upcoming releases of magento 2, Following are some important terms used to describe the elements in the above magento 2 architecture image.
User Agent
User Agent is a software by which user requests magento url. Whenever user enter any url , “User Agent” sends http request to the server for response .
As predecessor entry point in magento 2 is also index.php. It includes bootstrap then creates app from bootstrap object and finally calls run function of bootstrap.
Bootstrap
Bootstrap provides environment for running magento app. It checks php version, sets default error reporting, define base path, initialize and populate autoloader (mapping from a namespace prefix to directories to search in for the corresponding class).
Bootstrap performs below actions
- Initialization of code
- Checks php version (if php version is less than 5.5.0 then shows error message and exit execution.)
- Sets default error reporting to “E_ALL”
- Define base path of root directory
- Initialize autoloader
- Sets status of profiler
- Sets default time zone to “UTC”
- Initialize / Create App
- Initialize object manager
- Get main configuration array from /app/etc/config.php
- Initialize object manager
- Run App
- Initialize error handler
- Initialize object manager if not initialized till now.
- Check maintenance mode is on or not if on then show maintenance page.
- Check installation has completed or not if not then redirect it to /setup/index.php
- Launch
- Get/Set area code
- Firstly it gets area code frontend or adminhtml
- Then sets area code
- Load config and configure
- It loads configuration according to area
- Get front controller instance and call dispatch function for routing
- Get/Set area code
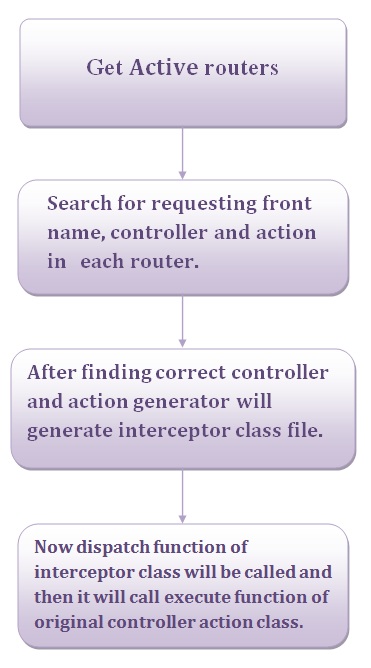
Routing
Routing is an algorithm for searching controller by current request. Router decides which controller need to be dispatched.
Get active routers list with help of area’s di.xml
- Search for front name, controller, and action in each router
- If found controller in router then generator generates its interceptor class and instantiate it.
- Call dispatch function of instance which will call original controllers action.
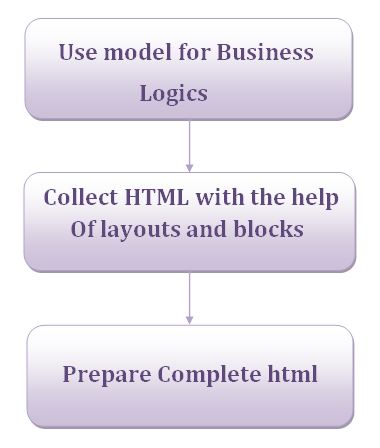
Controller
When controller and action is decided then execute function of action class is called. Here we can use model for business logic implementation. After implementing business logic’s it collects output by help of layouts, templates and blocks.
HTTP Response
After rendering complete output , Html will be sent to requesting Agent(Browser)
Output
In the end final requesting Agent will handle the output
Should you’ve any doubt, you’re most welcome to ask.
Thanks for your interest!
Team CedCommerce